Get your content live: hosting and domains
Your BeeRanked content goes live the moment you publish, on a fast, secure address, with zero setup. When you want it on your own domain, that takes about a minute. This guide covers every option, from the no-setup default to the most advanced. Pick one now and change your mind whenever you like, nothing gets locked in.
Good news: it is genuinely easy
You do not need a server, a developer, or a reverse proxy to use BeeRanked. You publish, and your content is live. To put it on your own brand, you add a single DNS record and we handle the certificate. That is the whole story for almost everyone.
If you have read that BeeRanked "requires reverse-proxy configuration," that is a misunderstanding. Reverse-proxy setup belongs to exactly one optional, advanced choice: serving your content under a path of your main site for the strongest SEO. Even then, we generate the one block you paste. The two simplest options never touch a server at all.
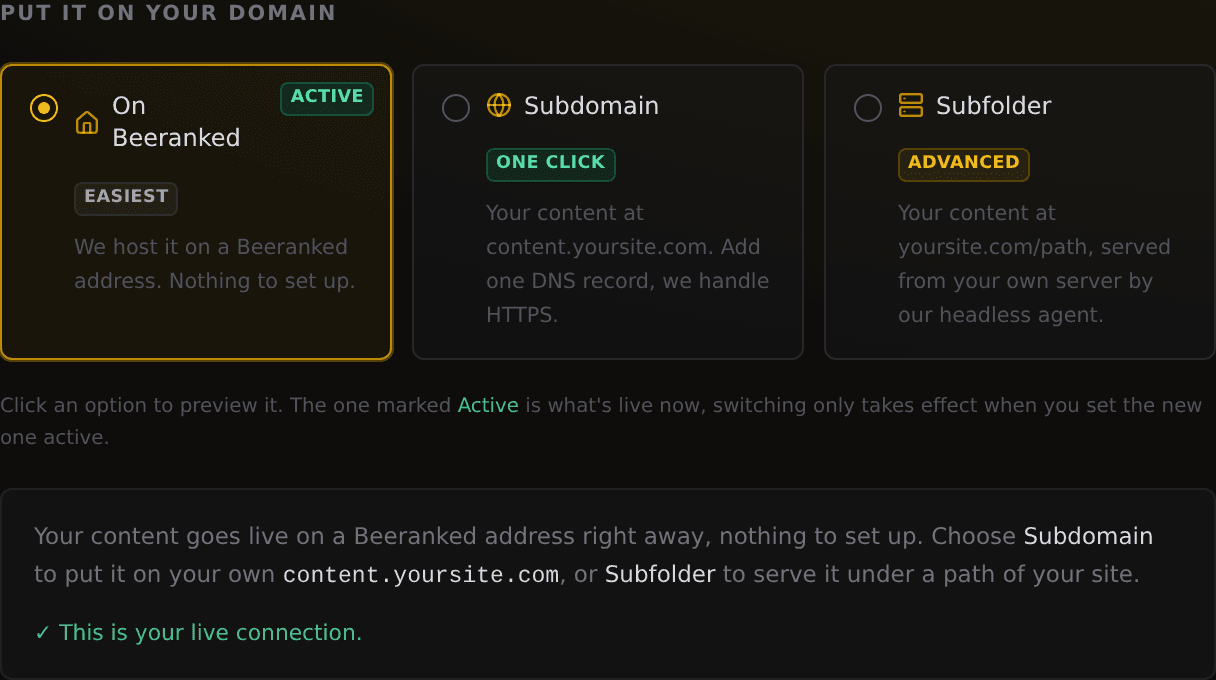
The four ways, easiest first
Stay on Beeranked. Live instantly at a Beeranked address. Nothing to set up.
Your own subdomain. Your content at content.yoursite.com, with one DNS record. We handle HTTPS.
A subfolder, via reverse proxy (advanced). yoursite.com/resources, by pasting one block into the web server you already run.
A subfolder, self-hosted (advanced). The same path, but the pages live on your own server via our lightweight agent.
Everything is managed in one place: Settings, then Connect your site. You get a single chooser, with the steps for whichever you pick right below it.
> Plans: staying on Beeranked is included on every plan, free included. Serving on your own domain (subdomain or subfolder) is a paid feature.
Stay on Beeranked (nothing to set up)
This is the default, and for many people it is all they ever need. The moment you publish, your content is live at an address like:
https://sites.beeranked.online/your-brand-content
Your exact address is the Live site link on your dashboard. HTTPS, sitemaps, and a fast global edge are handled for you. There is nothing to configure and nothing to maintain. Start here, rank today, and move to your own domain whenever you feel like it.
Your own subdomain (one DNS record)
This puts your content on a subdomain of your brand, like content.yoursite.com. It is the cleanest way onto your own domain, and it takes a single DNS record.
1. Go to Settings, then Connect your site, and choose Subdomain.
2. Type the subdomain you want, for example content.yoursite.com, and click Connect.
3. Add the one record we show you at your domain host (Cloudflare, GoDaddy, Namecheap, and so on): a CNAME named content pointing to connect.beeranked.online. Leave it DNS-only, with no proxy.
4. Leave the page open. Once the record is visible and the certificate is issued, usually a few minutes, the status flips to Ready. Click Set as active, and you are live.
We issue and renew the HTTPS certificate and serve from our global edge. There is no server for you to run.

A subfolder of your site (advanced, optional)
Skip this unless you specifically want your content under a path of your main domain, like yoursite.com/resources. It is the most SEO-powerful option, because search engines treat the content as part of your main domain, but it is entirely optional. The two options above need none of it.
Because a subfolder lives on a domain we do not serve, your side forwards that one path to us. There are two ways, and you choose based on how much control you want. Either way, set it up first in Settings, then Connect your site, then Subfolder: enter your domain and the path (like /resources), then Set up subfolder and Set as active.
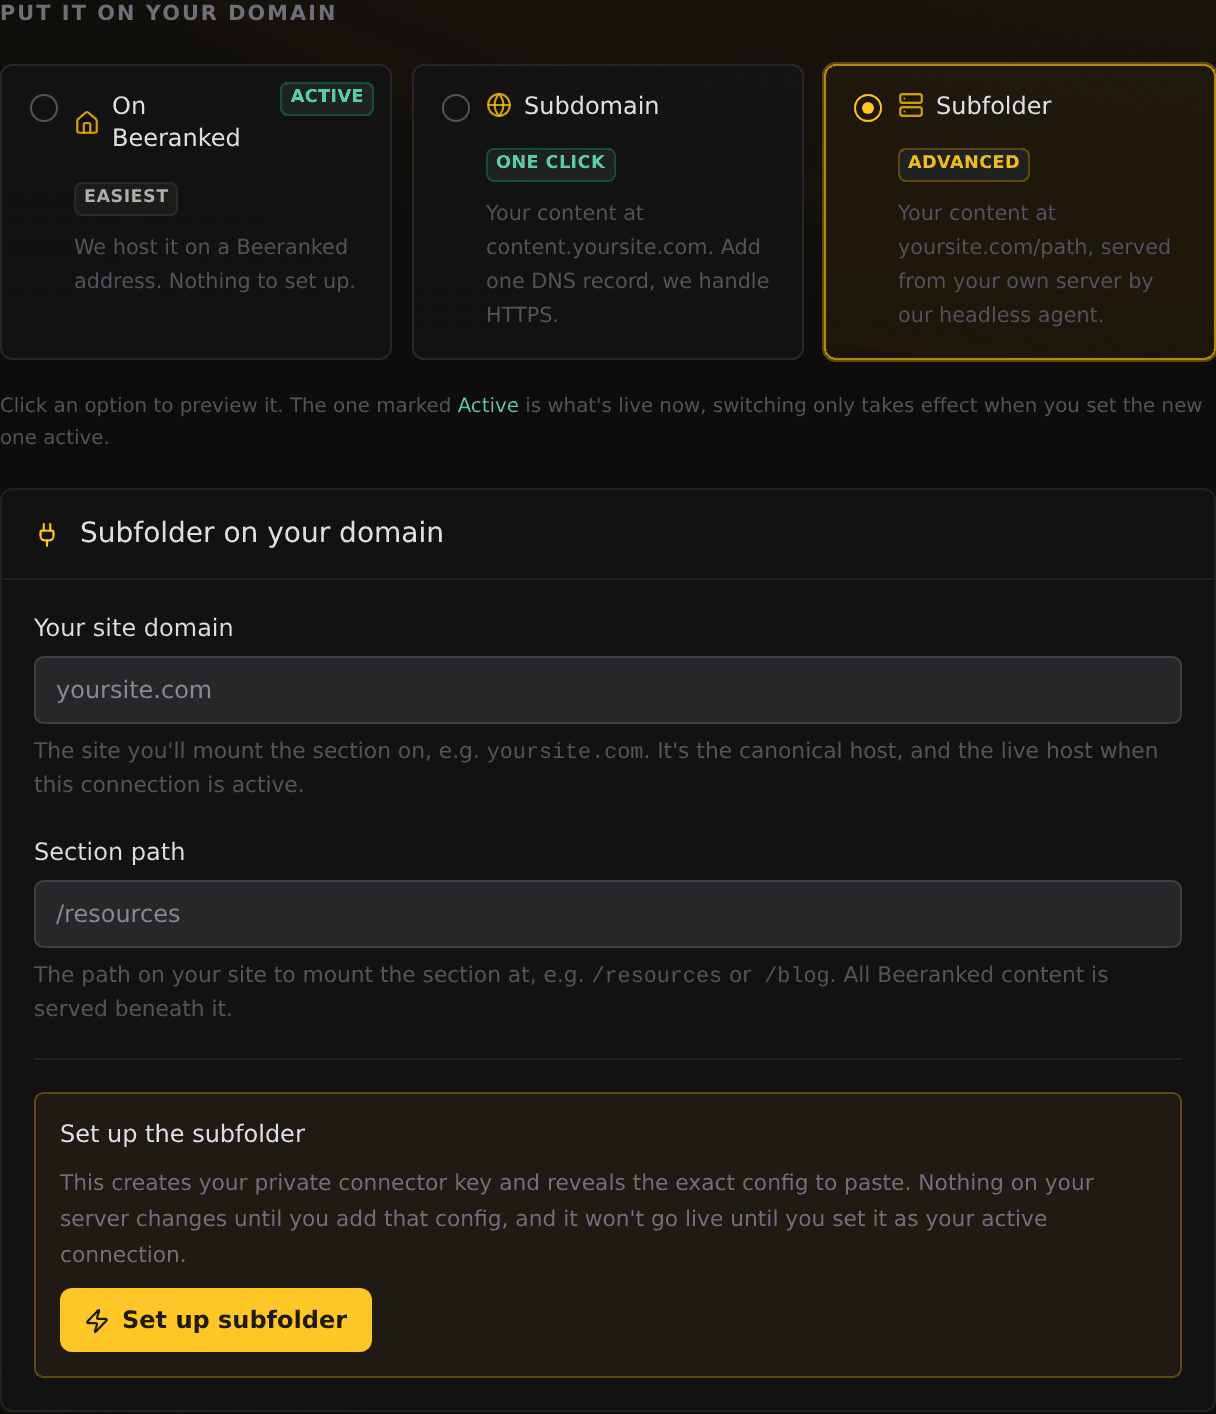
Point your existing proxy at us (no software)
If your site already runs behind a web server or reverse proxy (Caddy, nginx, Apache, or Traefik), this is the simplest path. Choose Reverse proxy to us, copy the one block we generate, paste it into your config, and reload. We render your content under your own domain, live, with nothing to install and nothing to sync. Set your domain in Brand details so your canonical links point at your domain.
Self-host with our agent
Choose this if you want the pages to live on your own server. Pick Self-host with our agent, run the one-line install command we give you (or the Docker command), and the agent pulls your published content into a folder and keeps it in sync. Then paste the proxy snippet we show, now filled in with your real folder path. The agent connects outbound to us, so there is no inbound port to open.
Which should I pick?
Just starting, or want it effortless? Stay on Beeranked.
Want it on your brand with almost no effort? Use a subdomain: one DNS record and you are done.
Want the strongest SEO and you already run a web server? Use a subfolder.
Most people start on Beeranked or a subdomain and never touch a server. You can always upgrade later.
Switching later is safe
You are never locked in. Each option keeps its own settings, so you can configure more than one and flip the active connection whenever you like. When you switch, we re-point and republish your content for you, and your existing pages and URLs come along. Start wherever is easiest.